Table Of Contents
🧠 Learning React from the Ground Up: Understanding Raw React APIs
React is the most widely used frontend framework in the world—and it’s not just for the web. It powers mobile, desktop, VR, and even terminal interfaces. But before we get into the fancy tooling or JSX syntax, let’s take a step back and understand how React works under the hood—starting with the raw React APIs.
In this post, we’ll break down the basics of React’s core building blocks and how they map to what the browser does. This foundational knowledge will make you a stronger React developer, and help demystify what’s really happening behind the scenes.
🔧 React Behind the Scenes
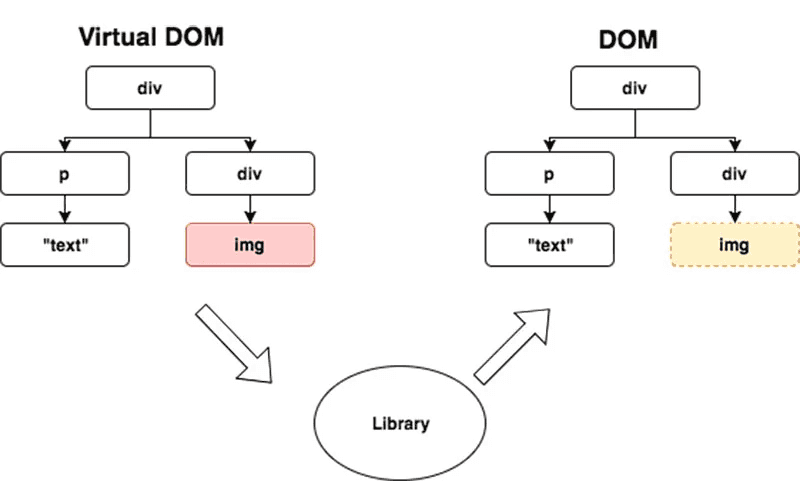
React abstracts the imperative browser APIs (like document.createElement) to give developers a declarative way to build user interfaces. This distinction between imperative and declarative programming is key to understanding why React is so powerful.
🧠 Imperative vs Declarative Programming Want to understand the difference? Check out Imperative vs Declarative Programming
Even though React gives us a high-level API, underneath it still relies on the same low-level DOM manipulation we’re used to. In fact, you can see where that happens in the React source code here.
🛠️ React vs ReactDOM
To build a web app with React, we need two JavaScript files:
- React: For creating React elements (similar to
document.createElement) - ReactDOM: For rendering those elements into the DOM (like
appendChild)
In a real-world app, you’d usually import these from npm:
import { createElement } from 'react'import { createRoot } from 'react-dom/client'
But for simplicity, in our learning environment, we’ll use pre-bundled files served from the /public folder:
/react.js/react-dom/client.js
These files are delivered via esm.sh—a service that helps us load React modules directly in the browser.

🧬 Creating React Elements (Without JSX)
React has a core function for building UI components: createElement. This is what JSX compiles to under the hood.
Let’s build a simple example:
import { createElement } from '/react.js'import { createRoot } from '/react-dom/client.js'const elementType = 'h1'const elementProps = { id: 'element-id', children: 'Hello world!' }const reactElement = createElement(elementType, elementProps)const root = createRoot(rootElement)root.render(reactElement)
💡 Tip: Try running
console.log(reactElement)to see how it’s structured!
🧩 Understanding props and children
In React, props are short for “properties.” They’re the way we customize elements—just like setting attributes in HTML.
One special prop is children, which represents the content nested inside the component.
There are multiple ways to define children:
Method 1: As a children prop
createElement('h1', { children: 'Hello world!' })
Method 2: As additional arguments
createElement('h1', null, 'Hello', ' ', 'world!')
Method 3: As an array
createElement('h1', null, ['Hello', ' ', 'world!'])
All these methods are equivalent from React’s perspective!
🧱 Nesting Elements
Let’s create a DOM structure like this:
<div class="container"><span>Hello</span><span>World</span></div>
To do this in raw React, we write:
const hello = createElement('span', null, 'Hello')const space = ' 'const world = createElement('span', null, 'World')const container = createElement('div',{ className: 'container' },hello,space,world)createRoot(rootElement).render(container)
⚠️ If you try to pass
childrenas a prop object with multiple elements, React might warn you to use akey—more on that later!
🍱 Deep Nesting Example
Here’s a more complex example:
<div class="container"><p>Here's Sam's favorite food:</p><ul class="sams-food"><li>Green eggs</li><li>Ham</li></ul></div>
Using React’s APIs:
const paragraph = createElement('p', null, "Here's Sam's favorite food:")const list = createElement('ul',{ className: 'sams-food' },createElement('li', null, 'Green eggs'),createElement('li', null, 'Ham'))const container = createElement('div',{ className: 'container' },paragraph,list)createRoot(rootElement).render(container)
🎉 Wrapping Up
Understanding how React works at its core—before introducing JSX or build tools—is a fantastic way to develop a strong foundation. You now know:
- How to use
createElementto build components - How
childrenwork in different forms - How to nest elements manually
- What ReactDOM does when rendering to the browser
And remember: this is exactly how React works behind the scenes, even when you’re writing JSX!
✨ Next time, we’ll look at how JSX simplifies all of this syntax while doing exactly the same thing under the hood.
Happy coding! 🚀 If you want to dig deeper, check out the official React docs. And stay tuned—we’ll soon build more complex UI with actual interactivity!
